Throughout your Jackrabbit database you will see grids, sometimes referred to as tables. These grids display the data you have entered into your Jackrabbit system.
| What is a Grid? | l | Grouping | l | Sorting | l | Filtering | l | Take Action | l | Other Customization |
What is a grid?
Jackrabbit grids are very powerful - allowing you to group, sort, filter for specific information, and more. There are many features in the grids that can be used to customize and work with the data displayed. Note: Not all features are available in every grid throughout Jackrabbit.

Grouping
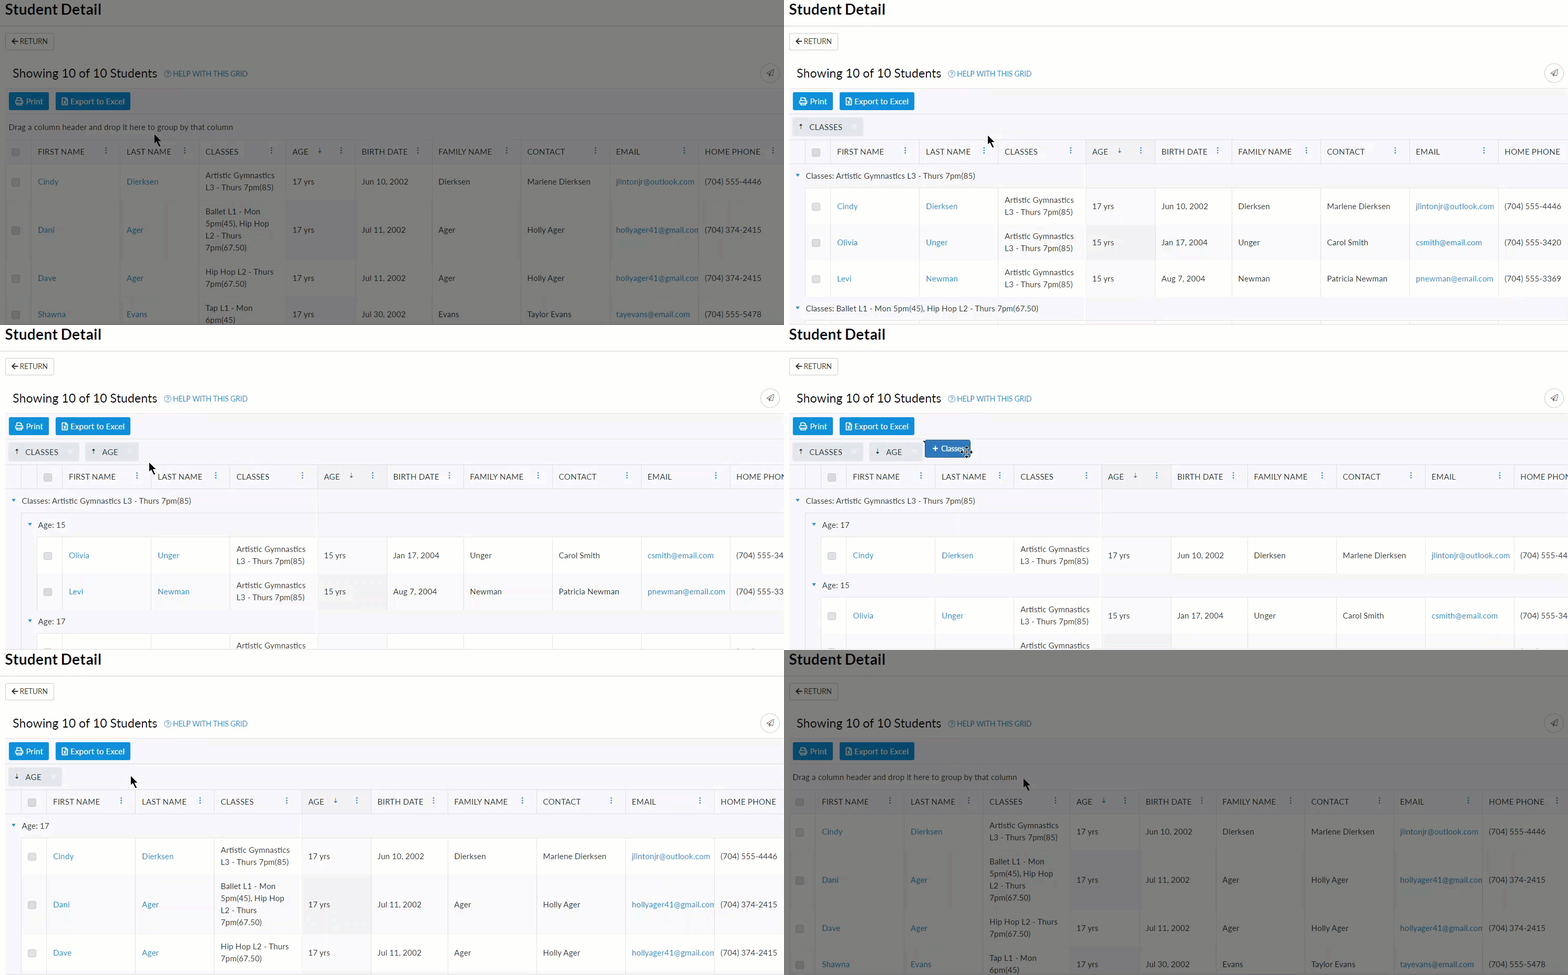
Drag and drop column headers to the grouping bar to create groups within your report.

- To sort your groups in ascending or descending order, click on the column header in the grouping bar.
- When multiple columns are added to the grouping bar, the first column on the left is the first level of grouping. The second column added to the grouping bar will group the rows within the first column, etc.
- Click and drag the column headers left or right within the grouping bar to change the grouping order.
- Use the X in the column header to clear a column from the grouping bar.
Sorting
The data in a grid can be sorted using a few different methods:
|  |
|  |
|  |
Filter Columns
Columns in the grids can be filtered from the column menu. More than one column can be filtered at a time. Click the column menu and select the Filter option.
There are several types of column filters. Some filtering will list all values in the column with checkboxes and a search field while other filters allow you to define the filter with options such as "Is equal to" or "Contains".

Take Action
Use the various action icons to work with the grids and the data in them. Some actions can be applied to multiple rows at a time by selecting the checkboxes for the rows you want included in the action (mass actions). Note: the action icons offered will vary between the different grids in Jackrabbit.
| Use the Save icon to save the choices you've made (the current view) as a favorite. Favorites can be private or you can choose to share them with your team. | |
| The Star icon will allow you to load a previously saved favorite. Search for a favorite or use the drop down to select. | |
| Use the Add icon to create a new record, e.g., with the Add icon in the Staff Certifications grid you can add a new staff certificate. |
Mass Actions
When one or more selections have been made in the selections column, mass actions allow you to work with multiple rows at one time. Use the checkbox in the column header to select all records that are currently displayed or select individual rows using their checkboxes.
| Use the Send icon to open the email editor and send an email to the selected rows. | |
| When multiple rows in a grid are selected, use the More icon to access actions that can be performed. The options available will differ between grids, e.g., in the Notes grid you can manage tags for selected rows. Changes will be affected to all selected records. |
 |
Other Ways to Customize the Grids
- You can reorder the columns in a grid by clicking and dragging them to the spots you want them in. Two arrowheads indicate where the column will drop (behind the arrowheads).

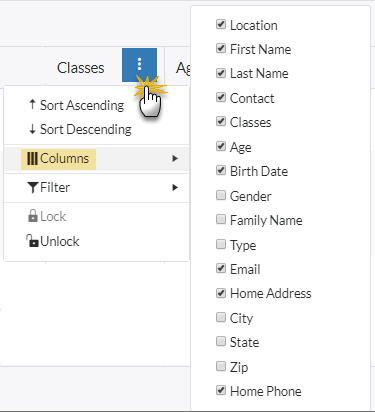
- Pick and choose which columns you want displayed using the Columns option from any column menu.

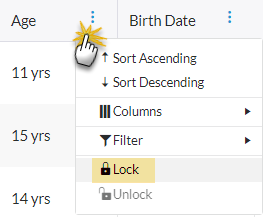
- When you are working with a grid that has many columns you will use the horizontal scroll bar to see the information on the far right of the grid. From a column menu you can lock that column so that when you scroll horizontally, that column will remain in the display while the remainder of the columns scroll.


