The first step in creating an event in your database is to create the Event Type. Think of this as the umbrella and all of the specific occurrences of that type of event (dates and times) are held under that umbrella.
To create an Event Type:
- Point to Events in the menu bar and select Add Event Type.
- Give the Event Type a Name, Location, and Category 1.
- Click Save.
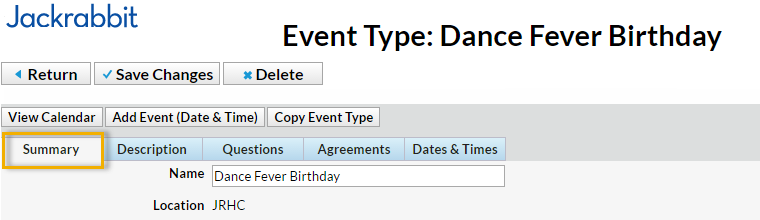
- In the Summary tab, enter specifics about the Event. Each Summary tab field is explained in detail below. While the fields are optional, Jackrabbit recommends you complete as many as possible. Be sure to Save Changes.
▼ Click here to see Event Type Summary Fields Explained Fee Enter the Event Fee. Allow Enrollment For Select Family if you prefer to allow a customer to enroll their Family and fill 1 Event opening. Select Student to allow the customer to enroll up to 5 students and fill 1 event opening per student. Note: This will be the default but it can be changed for any of the event dates individually. Min Age / Max Age Enter a minimum and maximum age for the event, including years and months. The min/max age can be used to set age restrictions for event registrations. Cut Off Date Optionally, enter a Cut Off Date. If a cut off date is entered, the student's age on the cutoff date is used to determine if the student meets the event's age requirements. Cat 2 / Cat 3 Add a Cat 2 / Cat 3 if applicable. Max Size Enter a Max Size. Note: For a Birthday Party or Private Event, enter the Max Size as 1. This ensures that the event is booked by only one customer. Credit Card Required Choose a selection from the drop down list. Select Yes to require that the credit card fields be completed. Select No to not display the credit card fields. Select Optional to display the fields but allow the registrant to choose whether or not to add credit card details. Note: The option to pay via bank account is not available when registering for an event. Post Event Fee Per Select Family to auto-post the Event Fee once per Family. Select Student to auto-post the Event Fee once per student. Select Do Not Post Fee if you do not want the event fee to automatically post when a customer registers. Session Add a Session from the Session drop down choices. Transaction Type / Sub-Type / Note If Post Event Fee Per is set to Family or Student, include a Transaction Type. Optionally, include a Sub-Type and Note. Display on Internal Calendar Select Yes / No depending on whether this Event should display on the internal Event calendar. This calendar can only be seen by a user logged into your Jackrabbit database. Calendar Label Whatever you type here will display as the Event Name on the Event Calendar. Background Color Click the crayon icon to choose a color. This color will display as a background for the Calendar Label on your Event Calendar. Jackrabbit recommends using lighter colors as they make the calendar easier to read. Display to Customers Select No if you do not want the Event to display on your Event Calendar. Select Open Dates Only if you prefer only open events be displayed on your Events Calendar. Select Open & Booked Dates if you prefer that both Open & Booked Dates display on your Event Calendar. Calendar Header Whatever you type here will display as the Event Name on the Event Calendar. Web Reg Form Graphic URL It's possible to display your logo (or another image) on the Event Registration form, however, the URL for the image must be added here. See the Event FAQ section for directions. Notification Email(s) An email notification will be sent to the email address(es) entered here whenever a customer registers for an event. Separate multiple email addresses with a comma. - Go to the Description tab and add the Internal Description (this description is seen by users in your database) and the Registration Form Description (this description will be seen by customers). Save Changes.
- On the Questions tab you will add questions specific to the event, for example "Will you be bringing cake?". Choose from 4 types of questions (Check box, Text box, Large Text, and Yes-No) that the customer will be prompted to answer before they submit their event registration. Text box, Large Text, and Yes-No type questions can all be set to Optional, Hidden, or Required. Check box type questions can only be Optional or Hidden; they cannot be made required.
- Select the Agreements tab. Enter any legalese or verbiage you'd like the customer to agree to prior to registering for an event. Each agreement text record will be followed by its own I Have Read and Agree checkbox on the Event Registration Form. The customer must check these boxes and enter their e-signature in order to submit the registration form.

Click Copy Event Type to quickly create another similar Event Type. This will copy all information on the Event Type Summary tab to the new Event Type with the option to copy questions and agreements.
Now that the Event Type is set up you can move on to the second step of adding an event, which is to create the specific dates and times that this Event Type will occur.