Jackrabbit offers you a few different ways to email schedules to your students:
- Email multiple student schedules at the same time.
- Email schedules for all students in a family.
- Email individual student schedules.
Note: Email Families & Email Student Schedules in the Families section must be selected as a permission for a user in order to use this functionality. To learn how to update user permissions, see Manage User IDs.
Email Multiple Student Schedules
- Go to Students menu > Email Student Schedules.
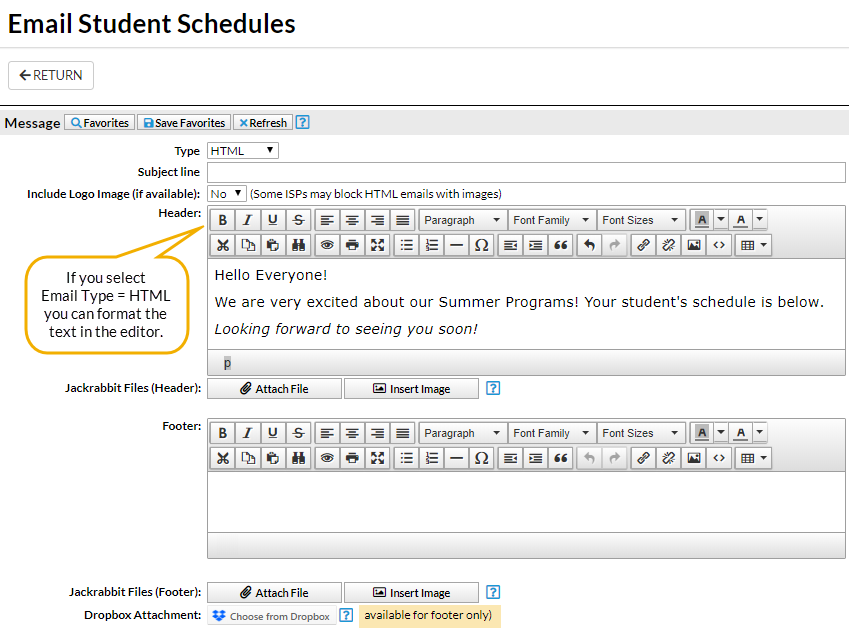
- Select a Type. For a full explanation of Type, see Email Type - HTML or Plain Text.
- Enter an Email Subject Line.
- Decide if you want to Include Logo Image. Note: You must have uploaded your logo in Tools > Edit Settings > Organization Logo.
- Enter a Header. Click Attach File or Insert Image to attach files and add images to the Header if needed. See the Help Article Email Attachments and Images for more details.
- Compose the email.
- Enter a Footer if applicable.
- Click Attach File, Insert Image, or Choose from Dropbox to attach files and add images to the Header if needed. Note: Dropbox attachments can be included in the Footer only.
- Select the following criteria:
- Use the Family/Student, Class, and Additional Search Criteria sections to select who to send the email to.
- In the Schedules section select which student schedules to email based on Session and Categories. To include Future Enrollments change this setting to Yes.
- Enter your Display Settings. These settings tell Jackrabbit what you'd like displayed (or not displayed) in the email. For example, if you don't want the instructor's name included, set Show Instructor to No.
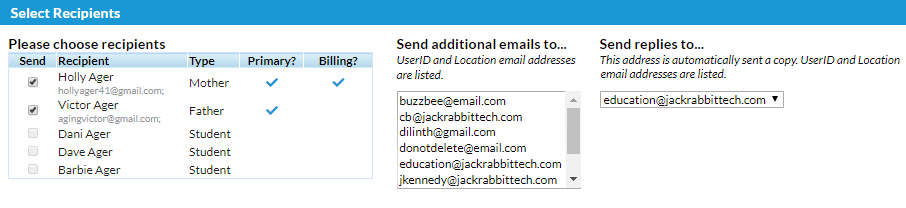
- In the Recipients section select who to Send Email To. You can send to Contact and Students, Contacts Only, or Students Only. The contact/student must have an email address on record.
- Contacts will receive the current schedules of all students in the family.
- Students will receive their current schedule only.
- If you would like to Include Opt Out Emails change the drop-down to Yes.
- Select a reply email address from Email Replies Sent To which includes the email addresses of all User IDs and Locations in your database (Tools > Edit Settings).
- Click Preview Email List.

Email Schedules for All Students in a Family or an Individual Student
- Use the global search at the top of the Jackrabbit page to search for the family you would like to email.
- Select the Family name or an individual Student name.
- Click the Email Schedules button.
- Select Recipients from the family contacts, additional emails addresses and replies.
- Select Schedules, Display Settings and compose the email Message. Add attachments or images if applicable.
- Click Preview & Send.

Preview & Send Email
| On the preview page, you can click any Preview link to preview an email. You can also clear a checkbox next to an email to prevent it from sending. When you are satisfied with the previewed list and email message, click SEND EMAIL. |  |
| A Success pop-up message will display when the emails are successfully sent. |  |
| Sample Email Sent Sample of a schedule email sent to Contacts, all active students in the family are included unless you have opted to send a single student schedule from an individual Student record. |  |
| Sample Confirmation Email Your organization will receive a confirmation email. The recipient(s) email address is listed. |  |
The emailed schedule is available in a family's email log (Family Misc tab > View Sent Emails button) for 365 days.
When you are sending emails to multiple recipients, a contact found more than once via the search criteria will only receive ONE email; they will not receive the email multiple times.
Save a Favorite for frequently used headers/footers and criteria.