When a student leaves one class to attend another (especially within the same session), Transfer the student to another class. When you transfer a student, they are dropped from their current class and enrolled into the new class on the dates you assign.
Transfer a Student
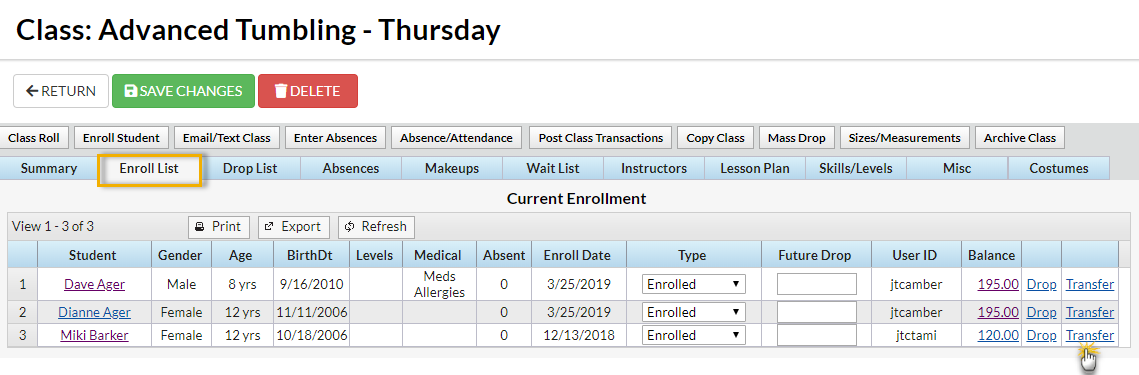
From the Class record, choose the Enroll List tab.
- Locate the student who is transferring and click the Transfer link.
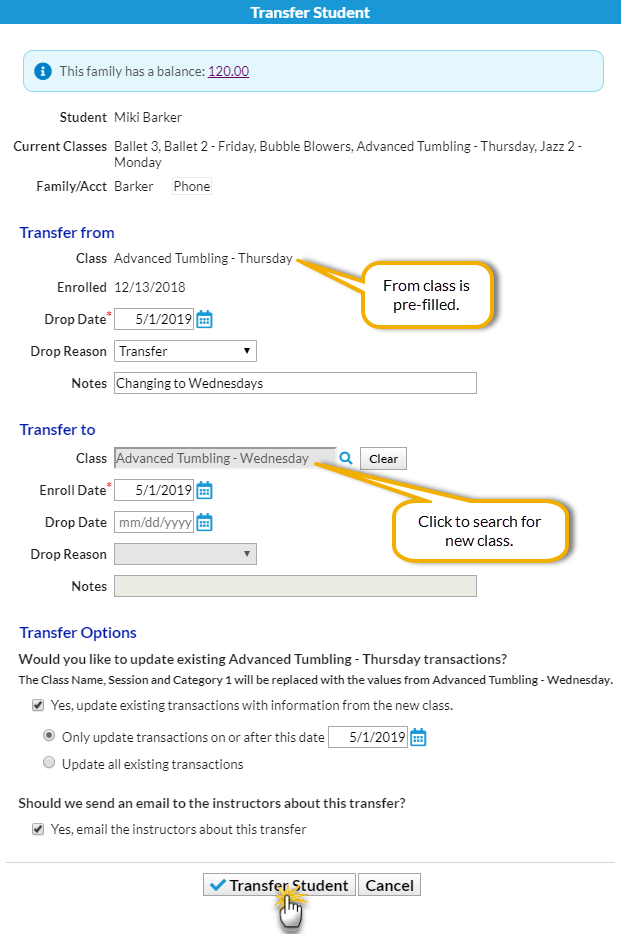
- In the Transfer Student window, set the Drop Date (defaults to current date). This is the date the student will be transferred out of the current class.
- Select a Drop Reason. Optionally add Notes.
- Locate the class the student is transferring into using the Class Search field.
- Enter an Enroll Date (defaults to current date). This is the date the student will be enrolled into the new class.
- If you are aware the student will be dropping the new class on a specified date enter the Drop Date and select a Drop Reason. Optionally add Notes.
- If the family has been charged and paid for the class the student is transferring out of and the fee/payment should be transferred to the class the student is transferring into, select the checkbox for Yes, update existing transactions with information from the new class. Choose to only update transactions on or after a selected date (defaults to current date) or to update all existing transactions.
- If you would like the instructor to be informed of the transfer, select the checkbox for Yes, email the instructor about this transfer.
- Click the Transfer Student button to complete the transfer.
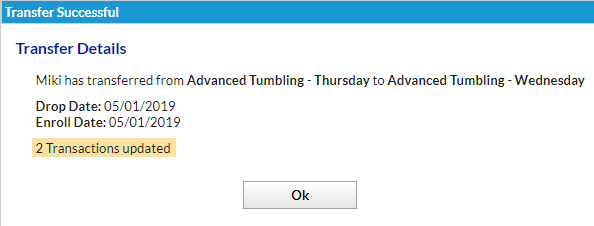
- The Transfer Successful window summarizes the transfer details, including how many transactions were updated.
You can also transfer a student to another class from the Student Summary or Class tab using the same process above!
The option 'Transfer Charges/Payments' that displays in the Transfer Student popup only applies to transactions that are associated with the class. With Student Based Billing, tuition fees will not have a class associated with them unless you have edited the transaction after it is posted.
Edit a Transfer
Transfers can only be edited before the student is transferred out of the class, i.e., the drop date is greater than the current date.
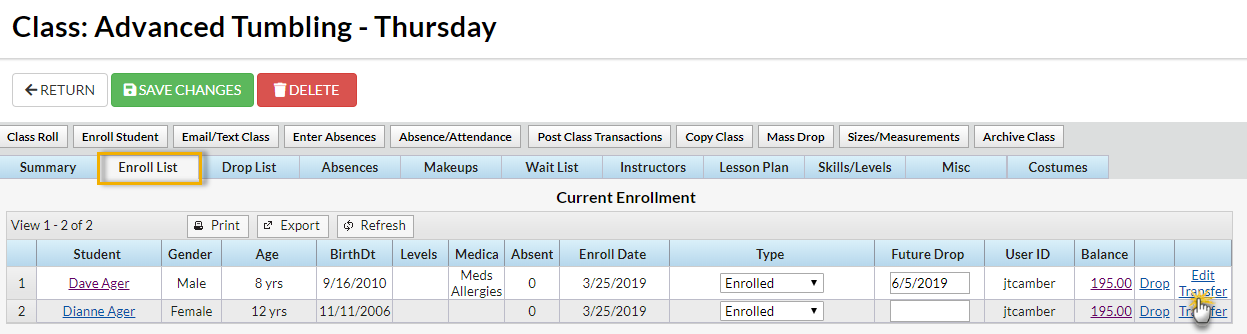
From the Class record, choose the Enroll List tab.
- Locate the student who is transferring and click the Edit Transfer link.
- Update the transfer details as needed in the Edit Transfer Student window.
- Click the Transfer Student button to complete the transfer.
- The Transfer Successful window summarizes the transfer details, including how many transactions were updated.
You can also edit a transfer of a student to another class from the Student Summary or Class tab using the same process above!
The option 'Transfer Charges/Payments' that displays in the Transfer Student popup only applies to transactions that are associated with the class. With Student Based Billing, tuition fees will not have a class associated with them unless you have edited the transaction after it is posted.