Watch a (2:20) video tutorial on Categories
Jackrabbit uses Class Categories to organize your database. Category 1 is the most important one because it organizes your revenue and enrollment. Category 2 & 3 are subcategories and provide level or sections.
Category 1
In the same way you organize your important documents into folders, Jackrabbit organizes your revenue and enrollment into Category 1s.
One of the main ways Jackrabbit does this is by assigning a Category 1 to each class. The Category 1s you assign to each class will help you in organizing tuition and enrollment.
For example, if you assign all your After School classes a Category 1 of After School, you'll be able to run reports telling you how much After School tuition you received during a range of dates. You'll also be able to run reports that tell you how many enrollments you have in the After School category.
You can also create Category 1s that aren't related to a specific class too (an example might be a registration fee or a late fee), so you can create reports on those fees as well.
To create Category 1 drop-down values:
- Go to Tools in the menu bar and click Edit Settings.
- Click Drop-down Lists in the left-hand column.
- Click Category 1 (Income Categories).
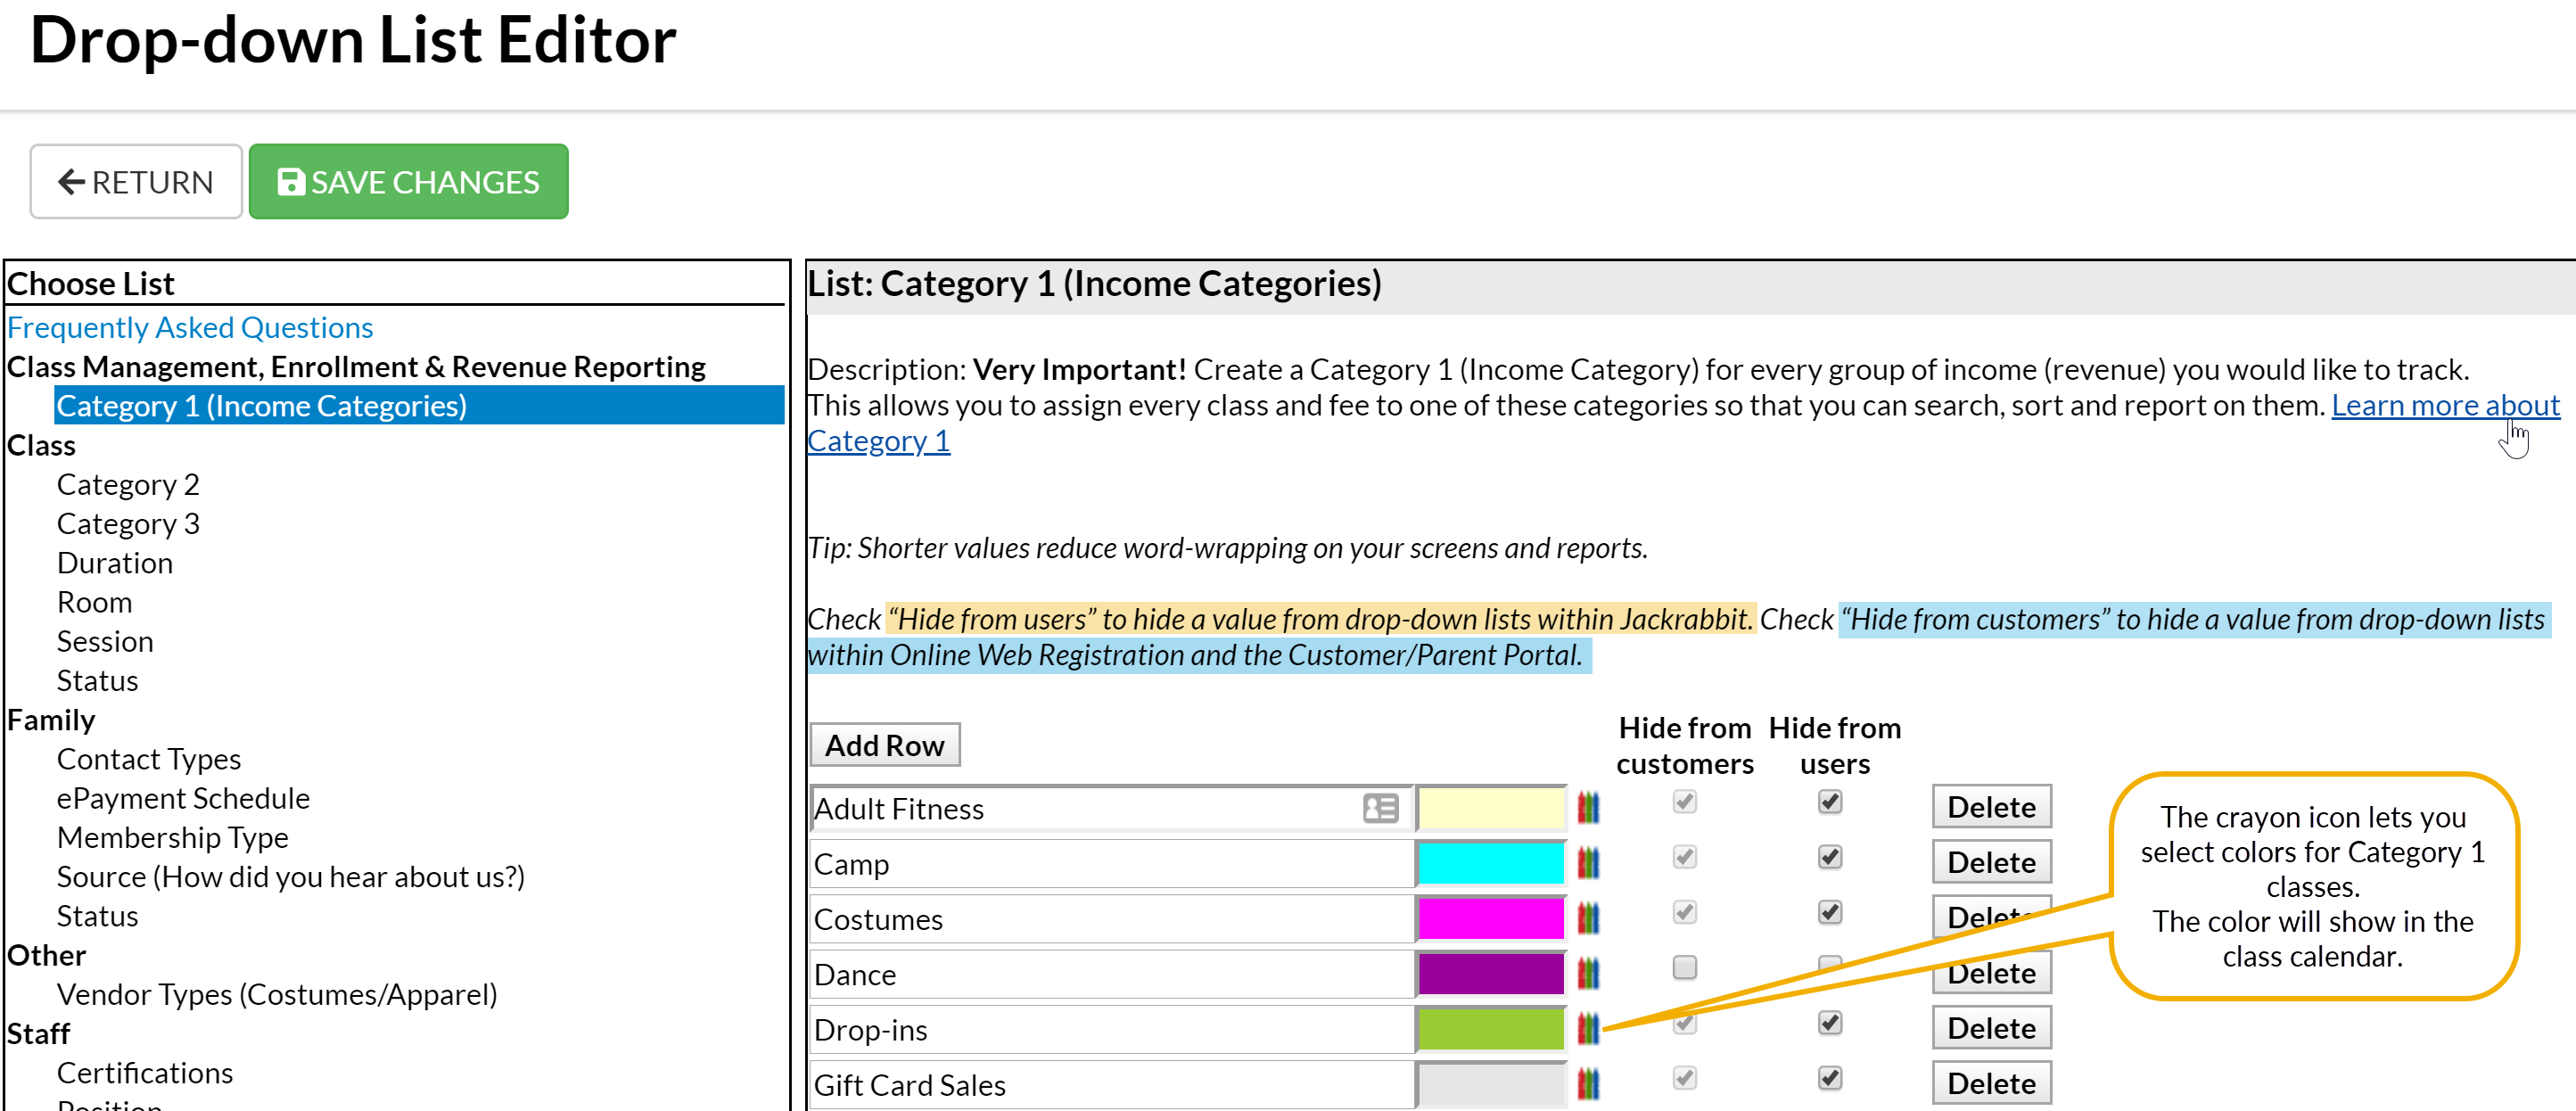
- Review the Category 1 values on the right.
- To remove Category 1 items that don't relate to your business click the Delete button.
Note: Use caution when deleting a drop-down category. One deleted it's impossible to search and report on any transaction that used the deleted drop-down name. - To add more Category 1 items, proceed to step 5.
- To remove Category 1 items that don't relate to your business click the Delete button.
- Click the Add Row button. Enter a name for the new category.
- Check Hide from customers if you do not want the Category 1 value visible to a parent when registering on your website or in their Parent Portal. This is useful for internal use only or for categories that are no longer in use and you don't want them to be visible. This can be updated at any time.
- Check Hide from users when you don't want the value to show in your drop-down lists in your database and online. When Hide from users is selected, the Hide from customers checkbox is automatically selected.
- Click on the
 Crayon Icon to select a color. The class will appear in your calendar in the selected color. You can group classes together by color. For example, all after school classes can be purple and all before school classes can be set to to green.
- Click Save Changes.

 Crayon Icon to select a color. The class will appear in your
 Category 1 Tips
- Create a Category 1 for every revenue group (Income received) you would like to track.
- Color coding your Category 1 fields is a useful when viewing Jackrabbit's schedules and calendars. It's a great visual way of defining classes. Light colors display with black text and darker colors will display with white text. You can add colors now or return to add them later.
Category 2 & 3
Category 2 and Category 3 fields are used to group classes together and can be useful when creating enrollment reports. Category drop-down values can be thought of as levels, with Category 1 being the top. Category 2 and 3 are the 'adjectives' where Category 1 is the 'noun'.
For example, a school may have a Category 1 value of "After School" and want to provide further breakdown between ages of After School such as "Math Time" and "Reading Help"; they could use Category 2 for this purpose.
Check Hide from users to hide a value from drop-down lists within Jackrabbit. Check Hide from customers to hide a value from drop-down lists within Online Web Registration and the Parent Portal. Always remember to Save Changes.
