A simple barcode scanner is all that is needed to scan barcodes. This can be purchased at any office supply store or online (listed as “USB automatic barcode scanner”).
Jackrabbit offers pre-formatted barcodes, however, you may find you prefer to create your own customized barcodes. To create your own, we recommend using a free BarCode Resource download along with Microsoft Excel. Once you've downloaded the free barcode software and set it up, creating your own barcodes is quite simple.
Pre-formatted barcode Labels
Download barcode labels 1000-5000
To create customized barcodes, you'll need to use a barcode software. We've offered instructions for installing a free barcode font below, however, there are numerous other barcode font software products available by internet search. Please note, Jackrabbit Support can not offer support on installing or using any barcode software.
The set-up steps must only be completed once.
Step 1 - Download & install free barcode software
A barcode is essentially a font that can be installed on your computer and used to create barcodes. This software will install a barcode font on your computer named, CCCode39.
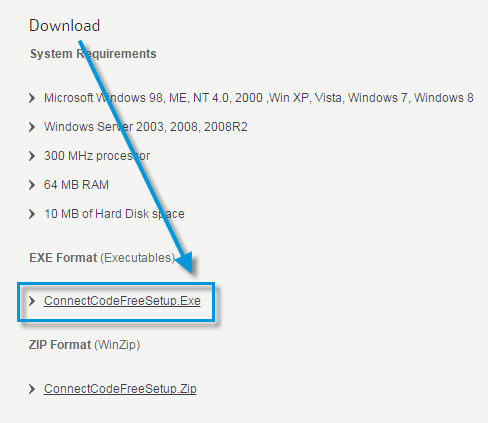
Go to: http://barcoderesource.com/freebarcodefont.shtml. Near the bottom of the page, select the ConnectCodeFreeSetup.exe option to download this file to your computer.

When the file download is complete, the Installation Wizard will automatically open. (If the Installation Wizard does not open automatically, it may be necessary to locate the downloaded file on your computer and click it to start the wizard.)
Click Next and follow the prompts to complete the install. It may be necessary to re-start your computer after the installation process finishes.
Step 2 - Create barcodes in Microsoft Excel
The Developer Tools tab must be visible in order create barcodes in Excel.
To make the tab visible in Excel 2010
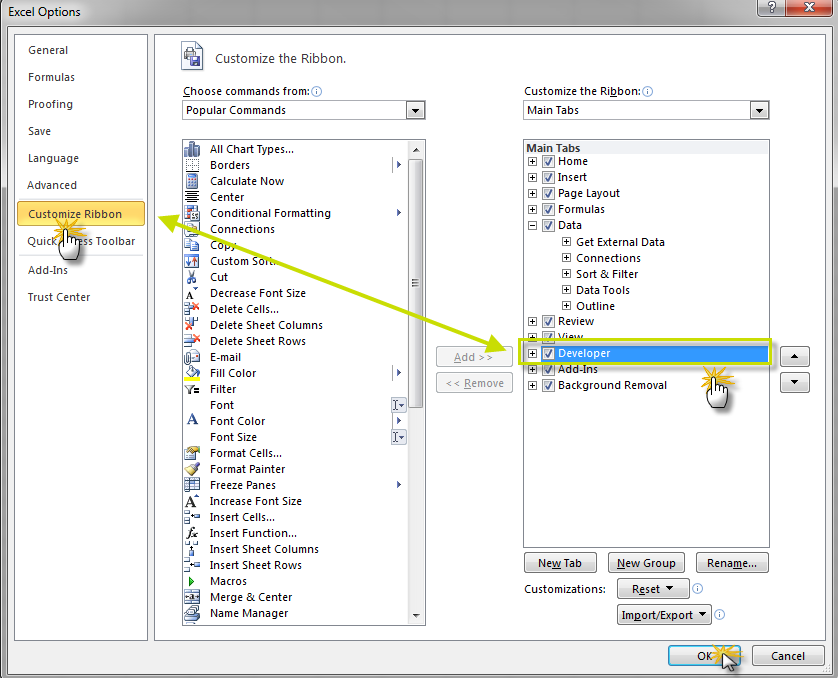
- Open Excel. Click File > Options.
- Click Customize Ribbon.
- In the Under Main Tabs area, select the Developer checkbox. Click OK.
Step 3 - Install Excel Macro Function
- Go to: http://barcoderesource.com/excelbarcodefont.shtml. Make sure you are viewing the section Using the Fonts - With Excel.

- Follow the step by step instructions in import the required macro to Excel. Reference the destination folder you made a note of in Step 1 when looking for the import file.
Create barcodes using Microsoft Excel
Listed below are instructions for creating barcodes in Microsoft Excel 2007, 2010, or 2013. You may also refer back to the website, http://barcoderesource.com/excelbarcodefont.shtml, for step by step instructions.
- Launch Microsoft Excel.
- Create a new Excel spreadsheet.
- In cell A1, type 12345678.
- In cell B1, type the macro function, =Encode=Code39(A1)
- Hit the Enter key to see the encoded barcode string, *12345678*.
- Change the font in the cell containing the encoded barcode string (Cell B1) to CCode39_S3. Set the font size to 24.
- Continue entering data into column A. Copy/paste the encode from B1 down, so that every number in column A has a corresponding encode in column B.
After you've created all barcodes, print the list to use as a reference when completing sales. You can scan directly from this printed list.
To create and print barcode labels, use the Excel file in conjunction with the mail merge function in Microsoft Word. For information on using mail merge with Word, reference Microsoft Word's help documentation.
