You can quickly email the students enrolled in a particular class using the Email/Text Class button located in the Class record.

- From the Class record click Email/Text Class to open the email editor.
- Select a Template if desired and the email Type (plain text or HTML).
- Enter an Email Subject Line and Message.
- Click Attach File, Insert Image, or Choose from Dropbox to attach files and add images if needed. See the Help Article Email Attachments and Images for more details.
- Using the Search Criteria, determine who you want to email.
- Select who to Send Message To. You can send to Contacts, Students and Staff, Contacts and Students, Contacts and Staff, Contacts Only, Students Only, or Staff Only.
- If you would like to Include Opt Out Emails change the drop-down to Yes.
- Select a reply email address from Email Replies Sent To which includes the email addresses of all User IDs and Locations in your database (Tools > Edit Settings). Note: This email address is also sent a copy of the email.
- Click Preview List.
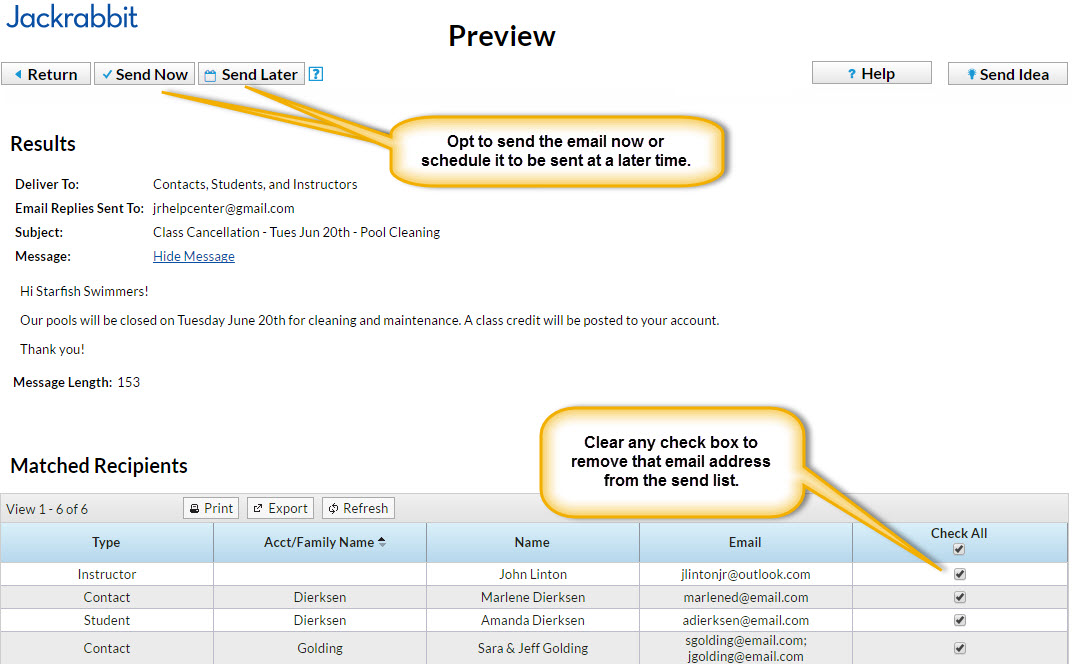
- In the preview, clear the checkbox for any families you want to omit. You can clear the Check All header checkbox to remove every email address and then select only specific families.
- Click Send Now to send the email right away or select Send Later to schedule the email to be sent at a later time. See our Help article Schedule an Email for more information.

Emails sent to contacts and students will be retained in the family email history for 365 days (Misc tab > View Sent Emails). At this time there is no log for emails sent to staff/instructors.