Before using QuickBooks and Jackrabbit together it is necessary to do a one time setup to associate every Jackrabbit Category 1 to your QuickBooks Income (revenue) accounts.
- Point to Tools in the menu bar and select QuickBooks Export.
- Click Assign/Edit QuickBooks Accounts in the left menu.
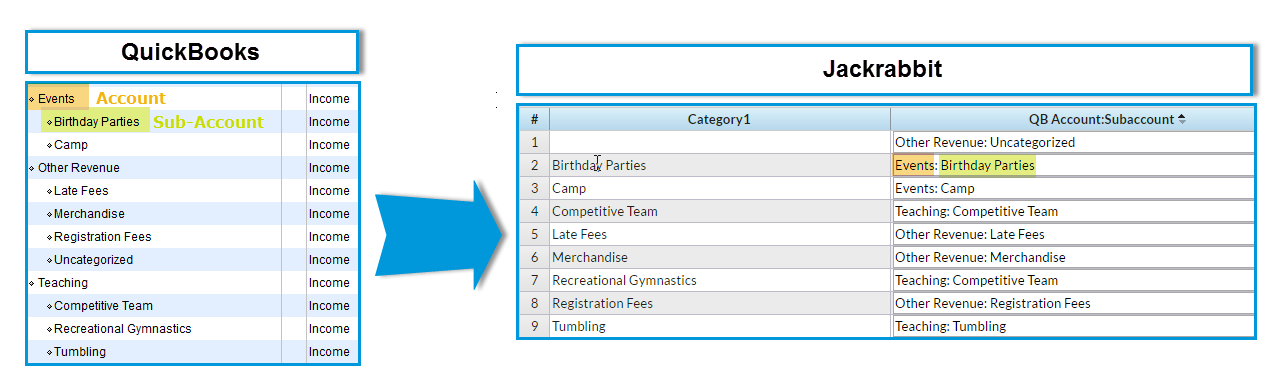
- The first line in the Jackrabbit Category 1 column will be blank. This is intentional and allows for a 'catch-all' for any uncategorized revenue. Assign this a QuickBooks Account that will draw your attention to its need to be allocated to a revenue source.
- Assign each Category 1 value the corresponding QuickBooks Account and Sub-Account (if applicable) separated by a colon. The names must be identical, a copy/paste is recommended to ensure 100% accuracy.
The name entered into the Jackrabbit QuickBooks Account:Subaccount must match the QuickBooks Account and Subaccount EXACTLY. The names are case sensitive. If the name does not match a QuickBooks Account exactly, a new account will be created in QuickBooks upon import of the IIF file.