Watch a (3:29) video tutorial on Emailing Families, Students, Classes or Instructors
From the Families menu you can use Email/Text Families to create an email to a group of families/contacts/students/staff (instructors).
- Point to Families in the menu bar and click Email/Text Families.
- In the Message section select an Email Template if applicable.
- Choose a Type (Email - HTML or Email - Plain Text Email) and enter an Email Subject Line.
- Enter the message body or edit the template body if needed.
- Click Attach File, Insert Image, or Choose from Dropbox to attach files and add images if needed. See Email Attachments and Images for more details.
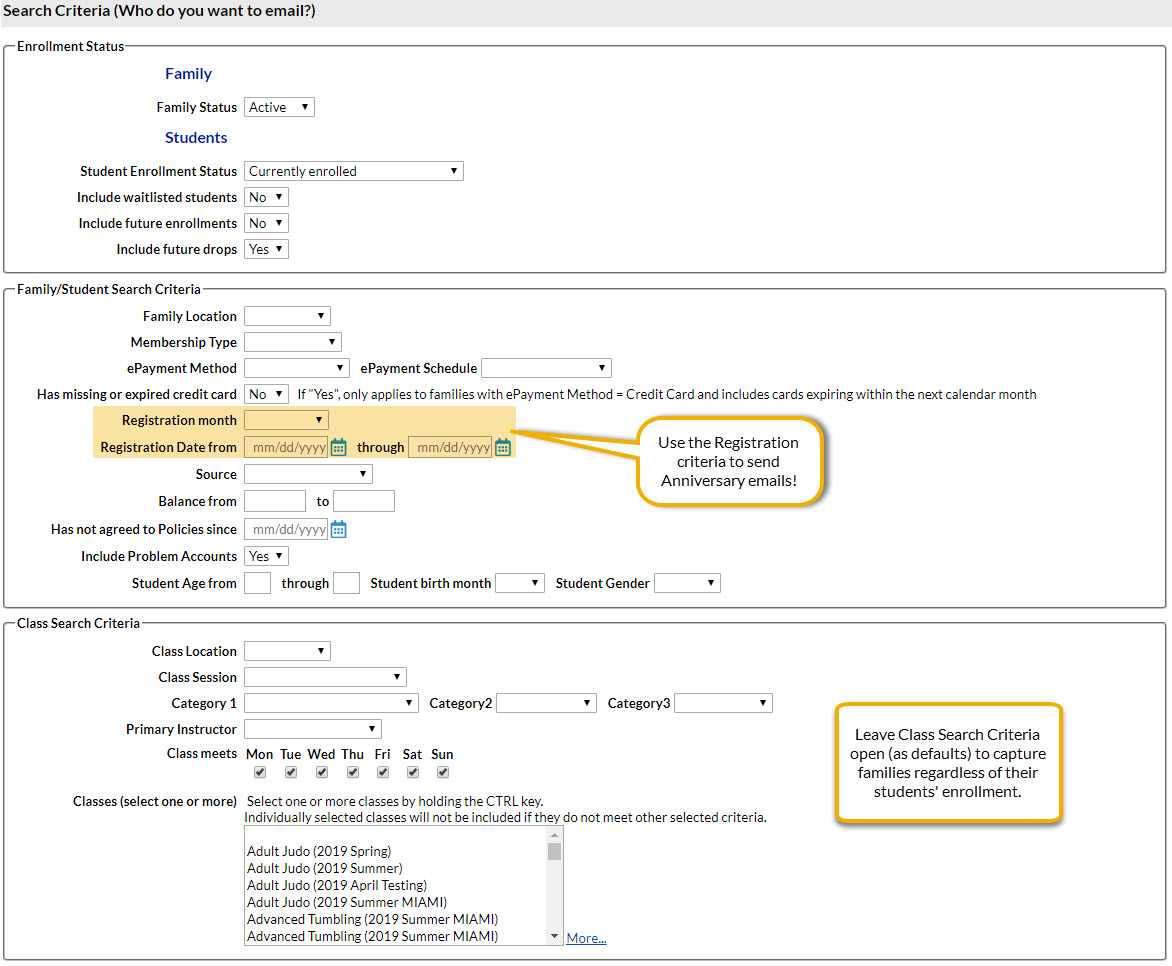
- Use the Enrollment Status, Family/Student Search Criteria, and Class Search Criteria sections to select who to send the email to. There are many ways to select groups of families for emailing.
- In the Recipients section select the Send Message To from several combinations of contacts, students and/or instructors. Emails will be sent to your selection based on the Search Criteria chosen above.
- Select whether or not you wish to Include Mass Email Opt-out. The default is set to No, however, there may be instances where you need to contact all families to notify of a closure or other non-marketing related information.
- If you have text messaging activated in your database select the applicable drop-down for Include Text Opt-In. By default this is set to All.
Set this to Not Opted-In if you have have already started the Opt-In Contacts & Students for Texting and want to send emails to families who have not yet opted in for texting. - Add a reply email address in Email Replies Sent To. This email will automatically be sent a copy of the email. Note: User ID ( Tools > Edit Settings > Manage Users and Permissions) and Location (Tools > Edit Settings > Locations ) email addresses are listed.
- Select addresses to Send Additional Emails To. Note: User ID ( Tools > Edit Settings > Manage Users and Permissions) and Location (Tools > Edit Settings > Locations) email addresses are listed.
- Click Preview Email List.
- In the preview, clear the checkbox for any families you want to omit. You can clear the Check All header checkbox to remove every email address and then select only specific families.
This is useful if you need to send a mass email to a group of email addresses that don't meet any specific criteria. Leave the Search Criteria wide open to list every family, clear the Check All header checkbox, and then select only the email addresses you want to send.

Click Send Now to send the email right away or select Send Later to schedule the email to be sent at a later time. See the section Schedule an Email for more information.
Emails sent to contacts and students will be retained in the family email history for 365 days (Misc tab > View Sent Emails).